[en] Wi-Fi Client to DMX Routing
[en] Receive WiFi input and pass that signal to the DMX output
[en] While acting as a Wi-Fi Client this Advanced Routing can pass ArtNet-over-WiFi to the fixture's DMX output versus Basic Routing where the DMX out is not active. Thus WiFi→DMX extends the capabilities of WiFi to support a daisy chain of other DMX devices from the client RR-R2.
[en] Please note that WiFi Routings are 1-universe routings, making use of just the [Input Universe] under [Ethernet Settings] which gets passed to the DMX output.
[en] Art-Net can be Broadcast or Unicast over WiFi as desired. sACN is not yet available over WiFi.
[en] Connecting to WiFi
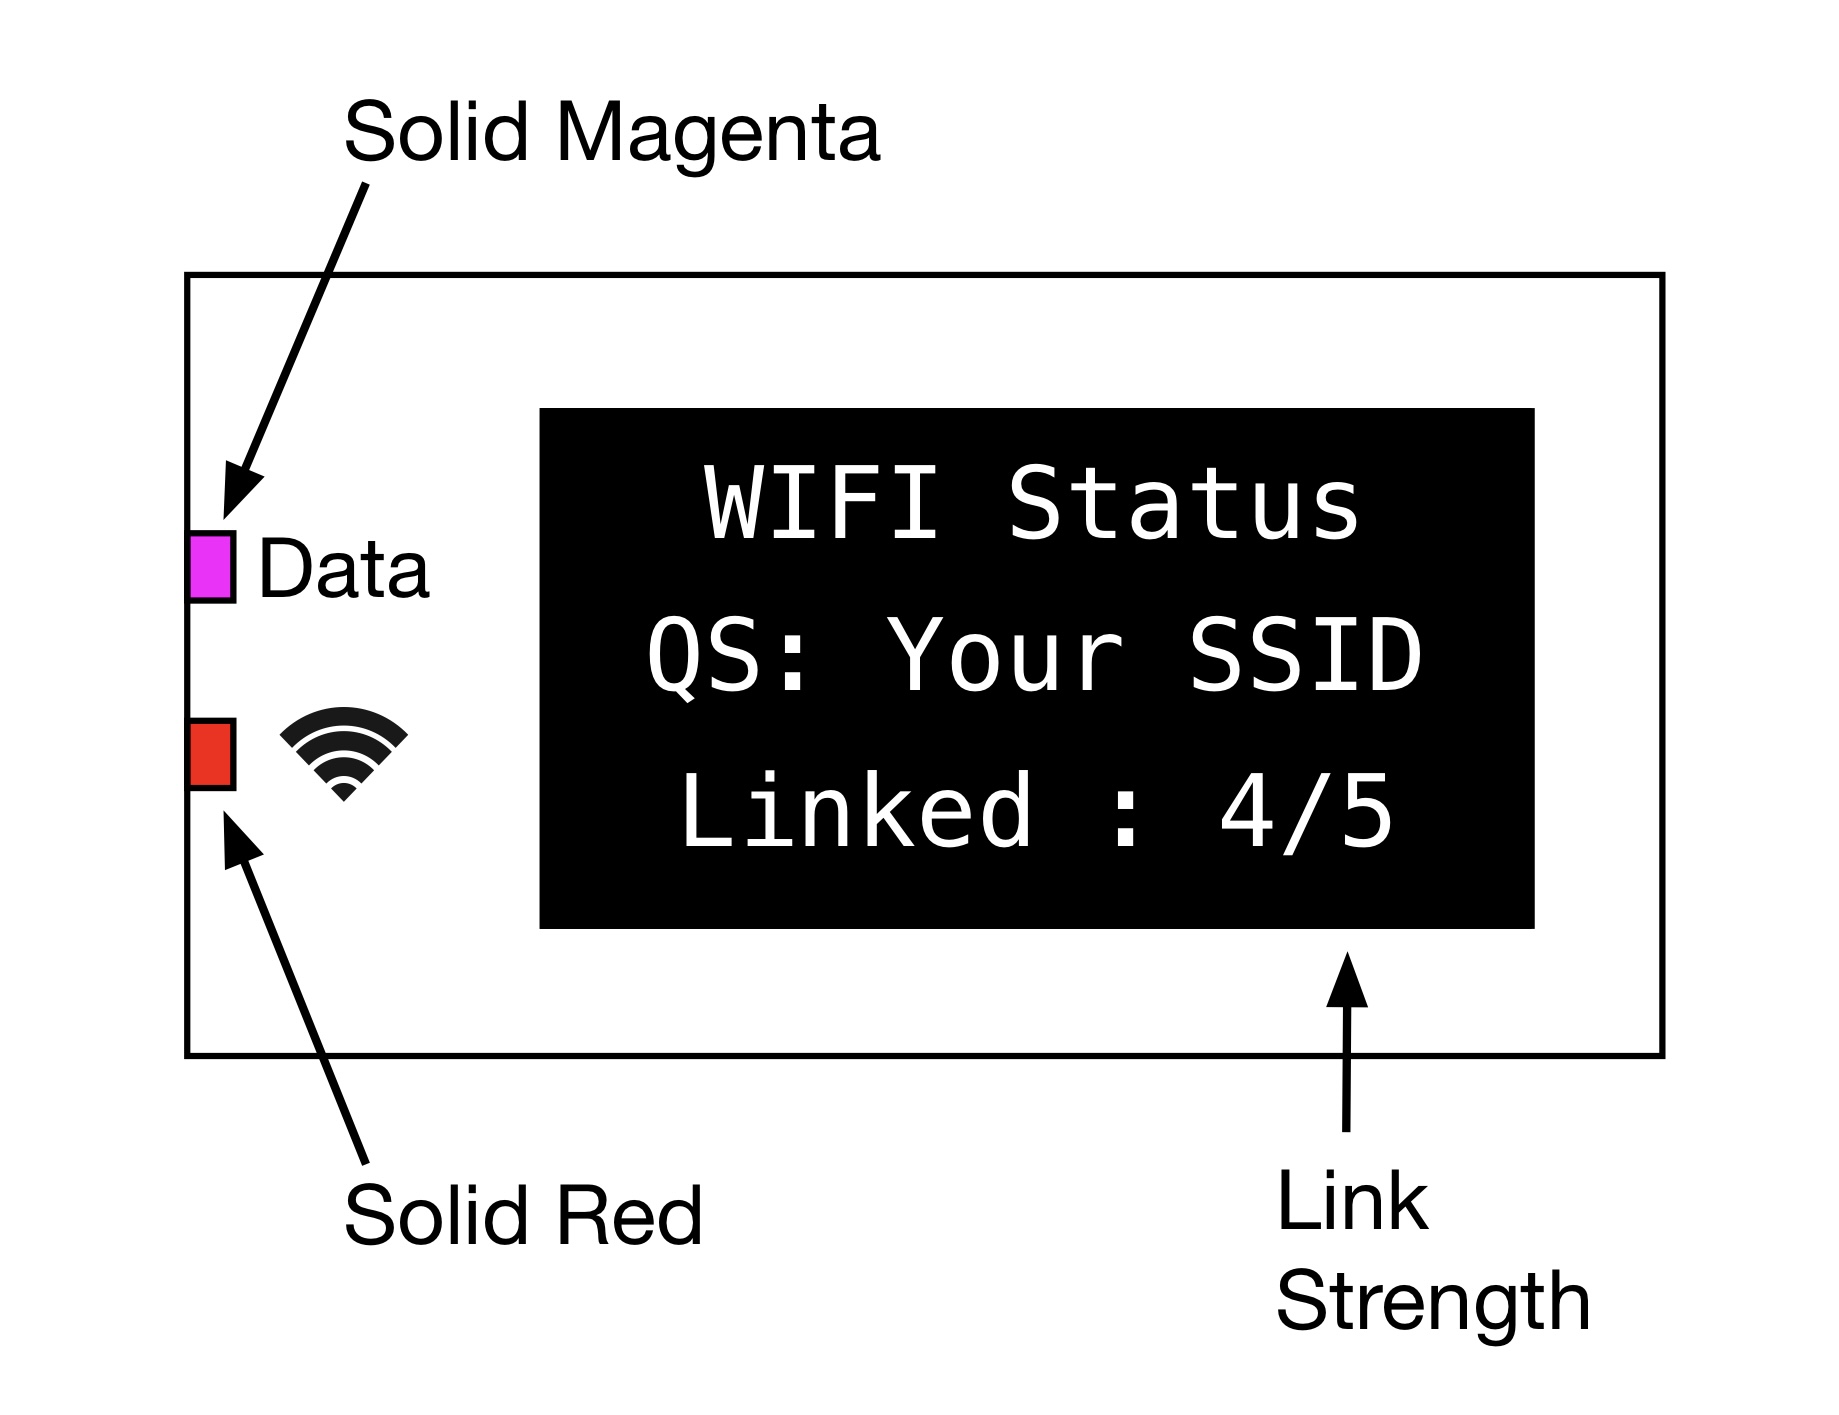
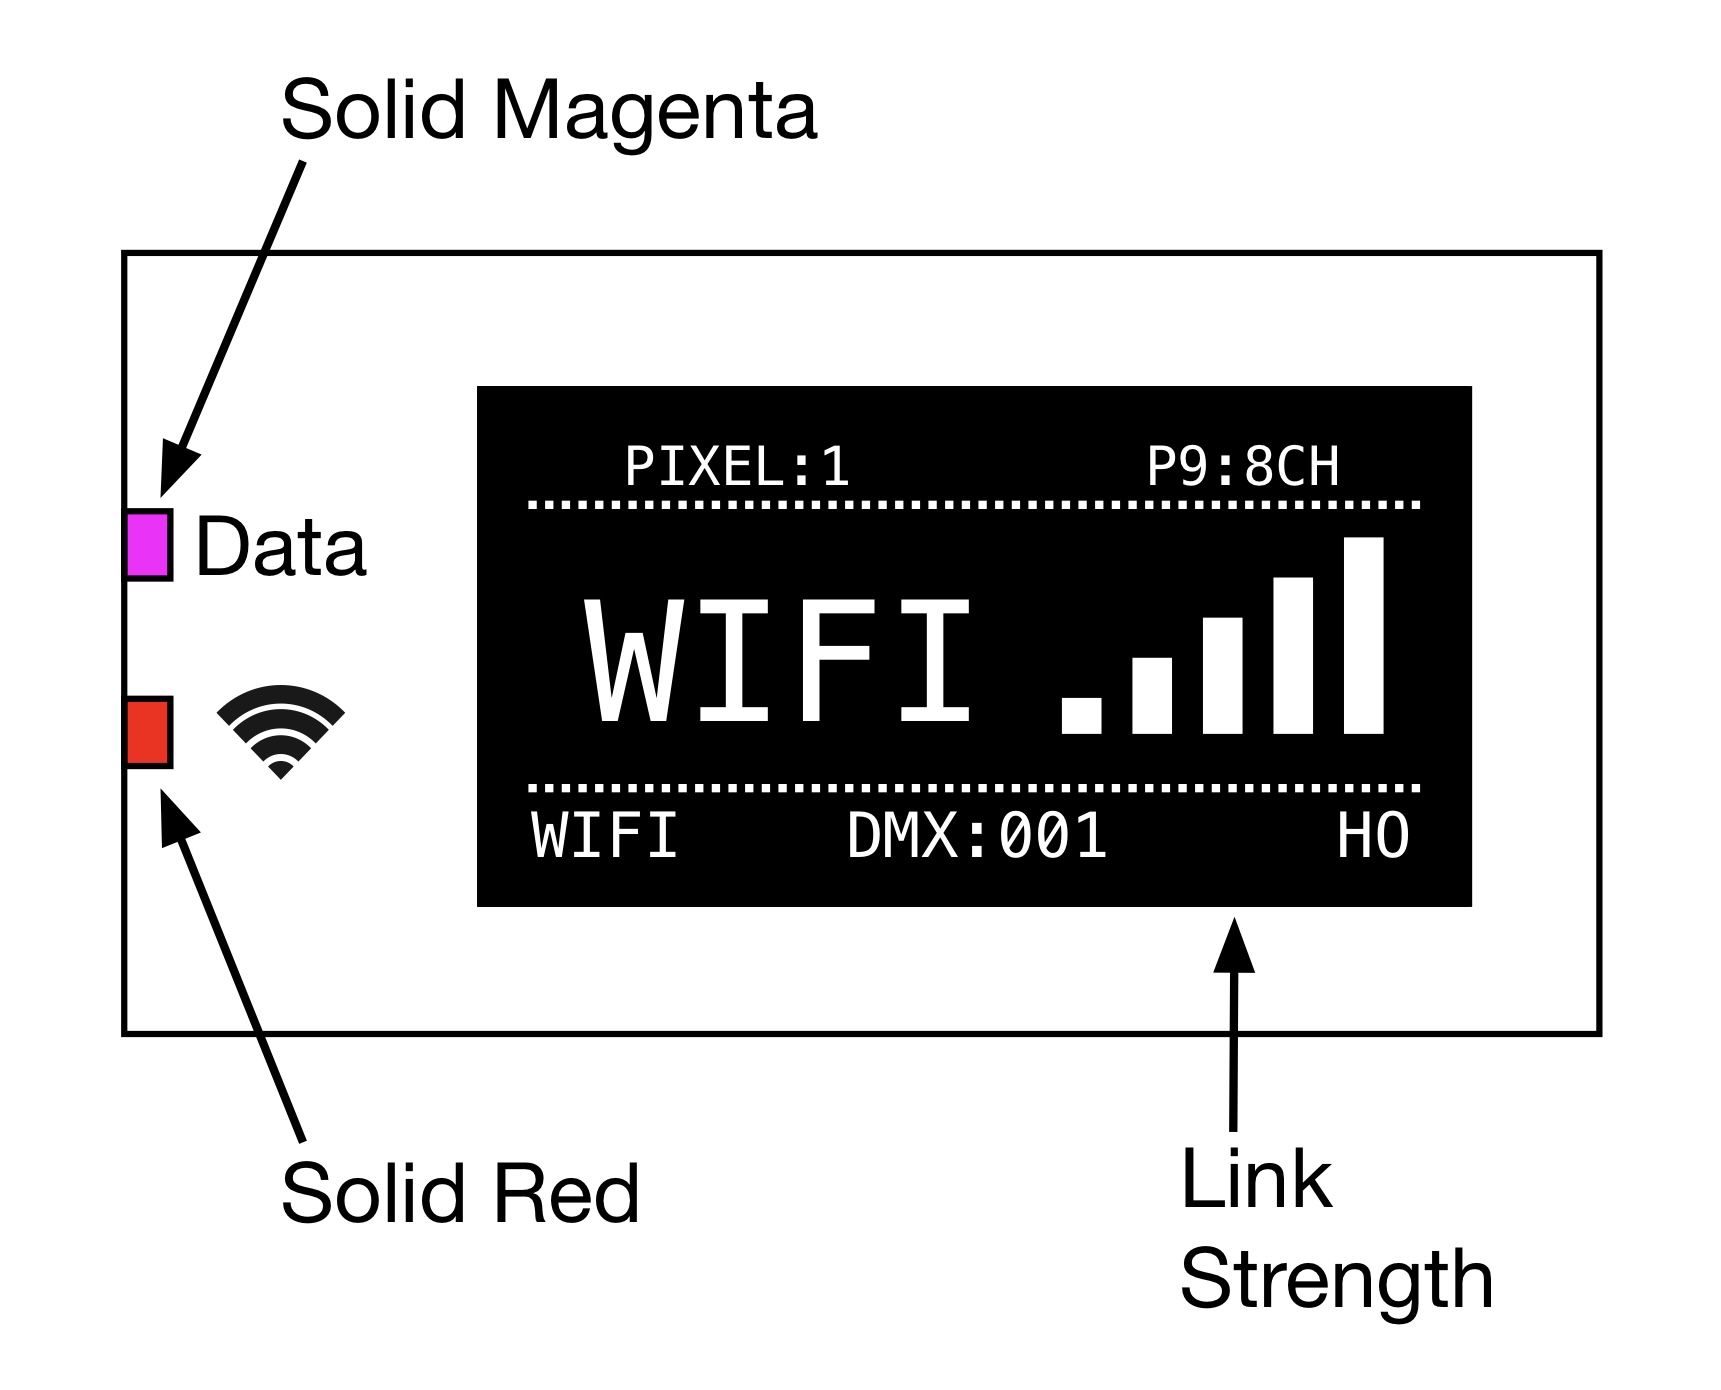
[en] The process to connect Advanced Routing is more or less the same as Basic Routing, with the only UI change being the Status LEDs take on an Input/Output scheme of Data LED = Magenta (WiFi In) / Wireless LED = Red (DMX Out), let's take a look.
 |
[en] First, navigate to [Config Menu] → [Advanced Routing] → [WiFi>DMX] and press ENTER.
[en] Then RIGHT Arrow over to [WiFi Settings] and press ENTER
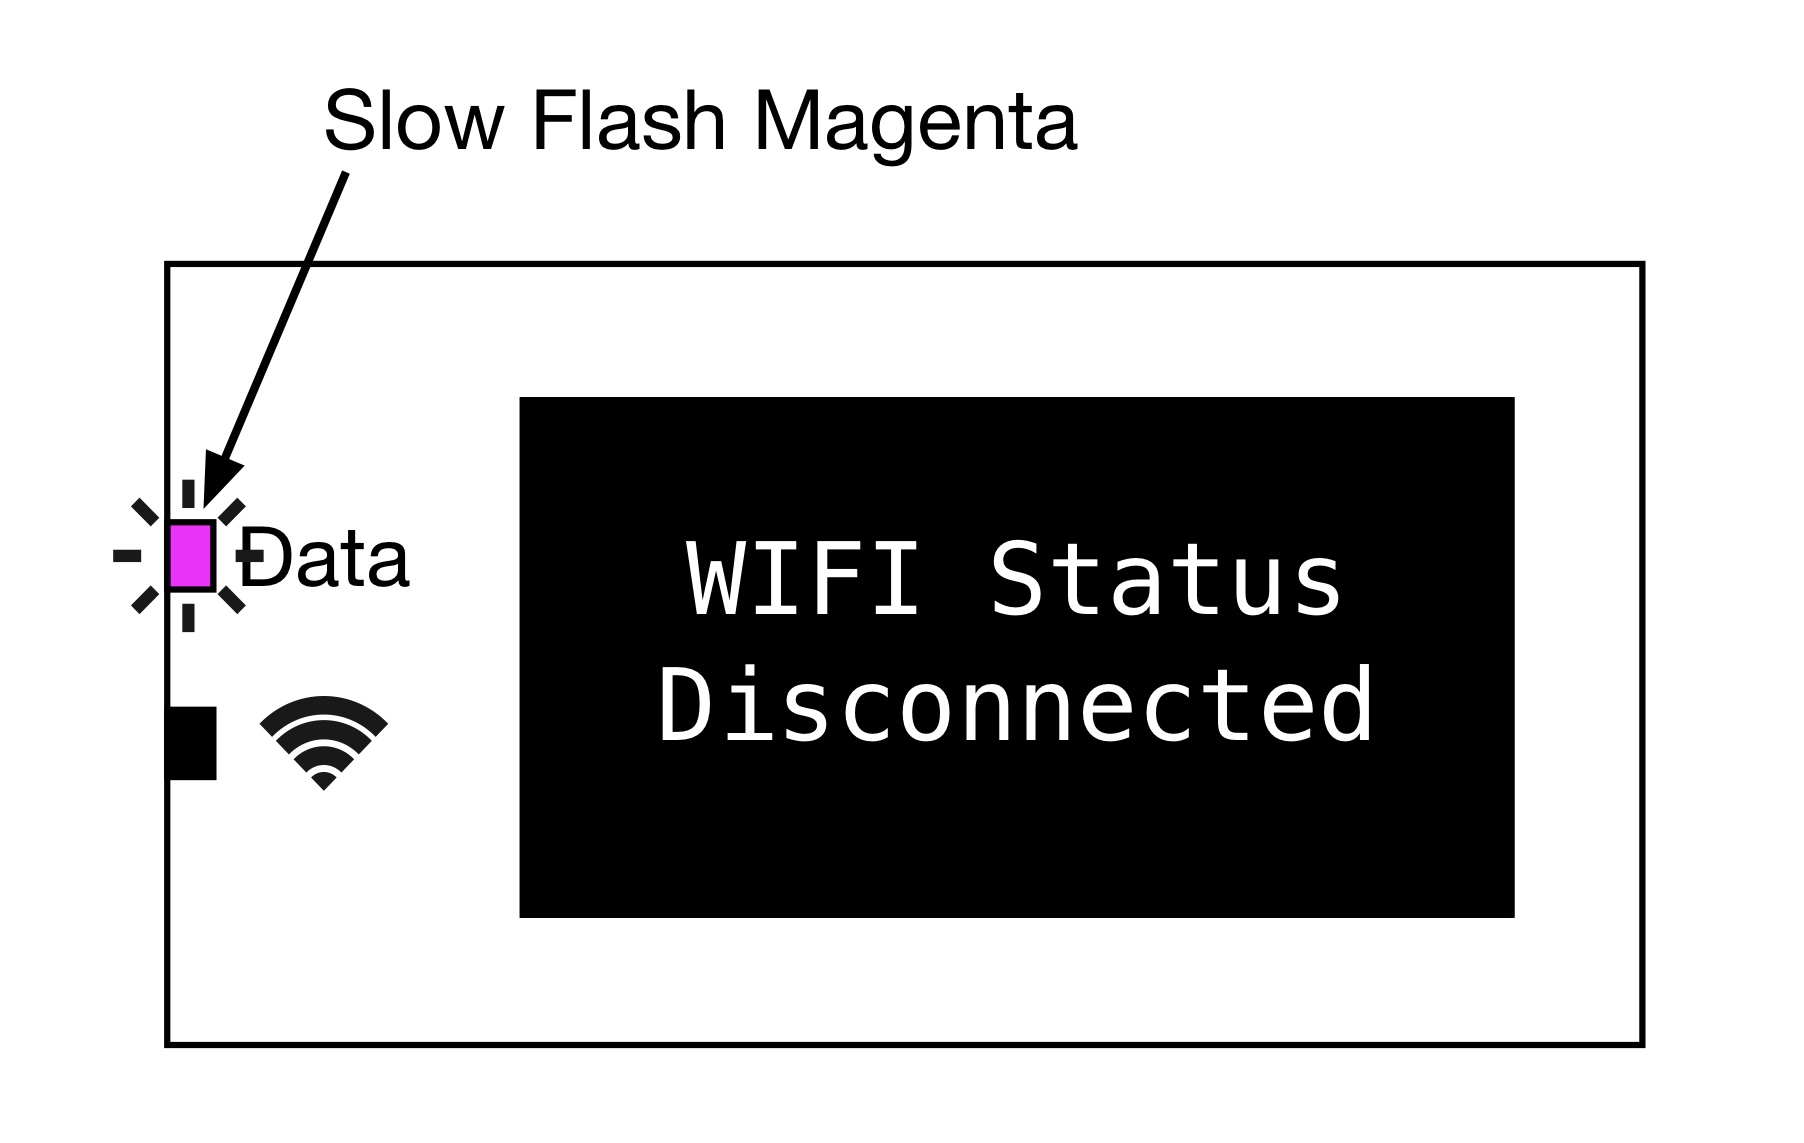
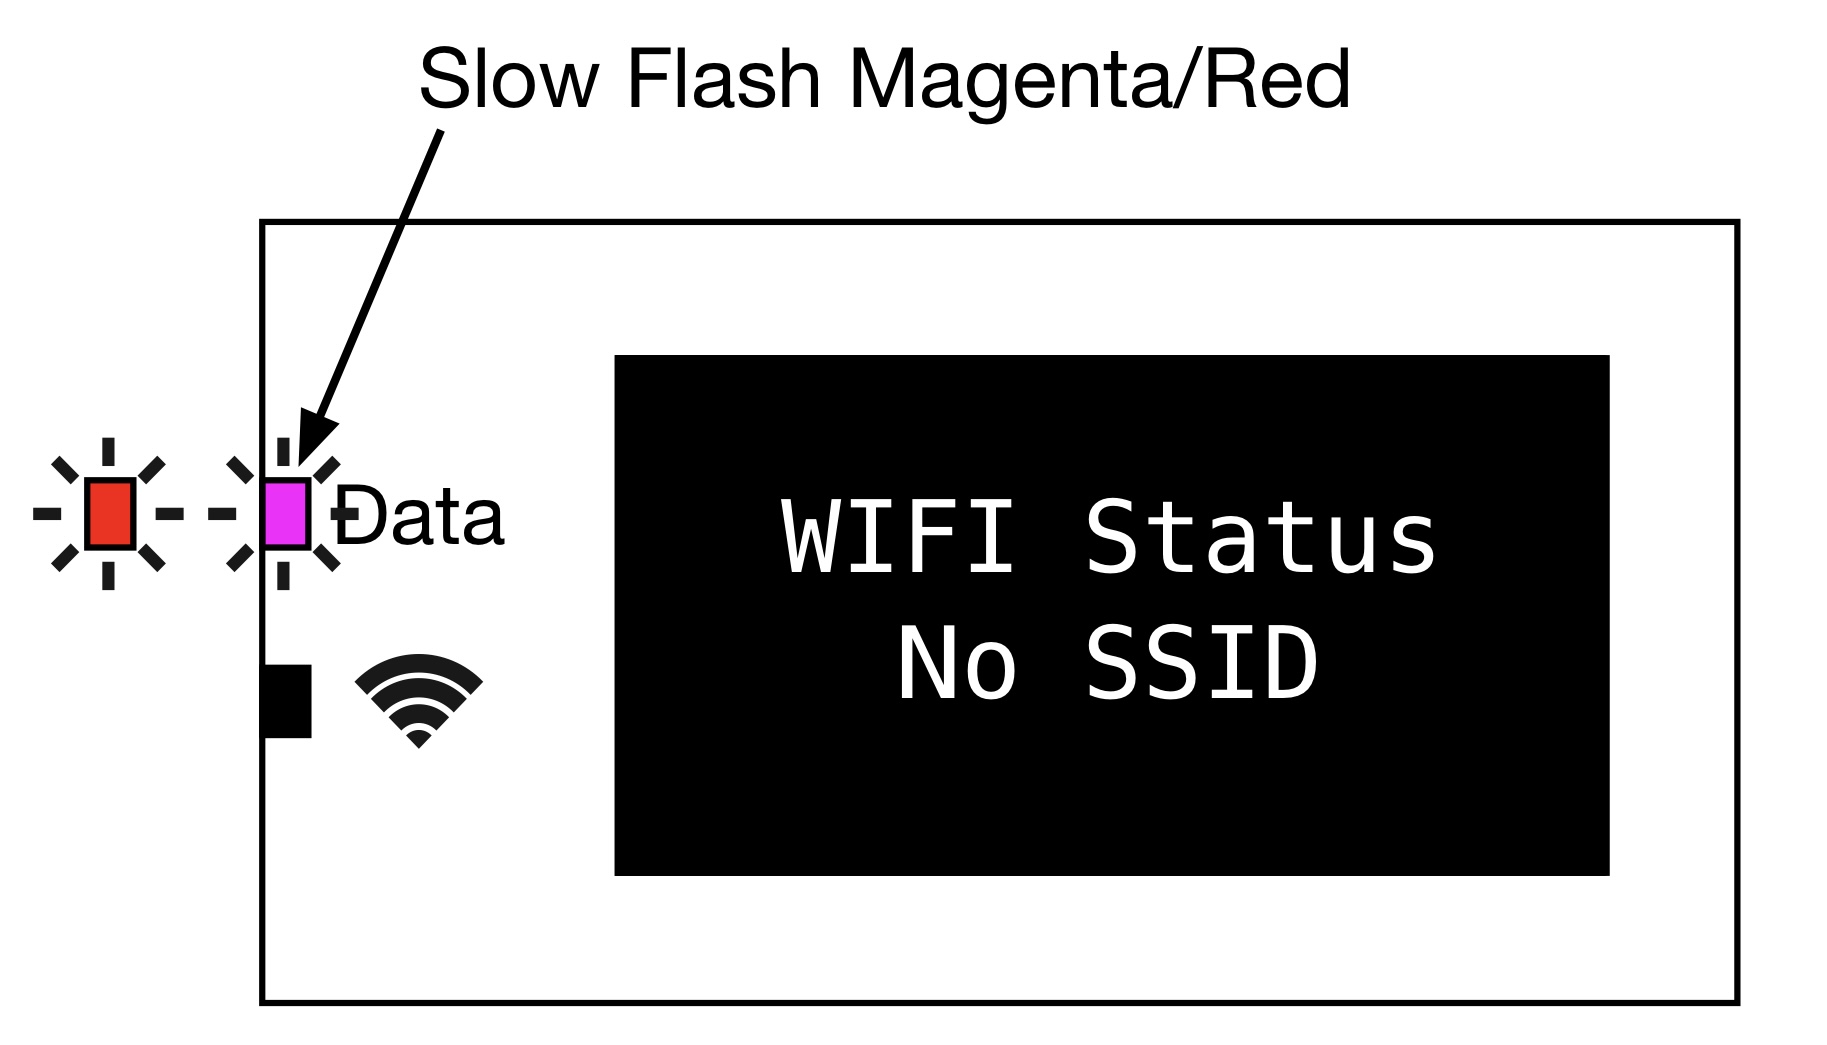
[en] If you are not already connected to a network you will see a WiFi Status screen indicating your are Disconnected. When there is no data or connection you will see a Slow Pulse indicating the mode is ON but there is no data/connection yet established.
 |
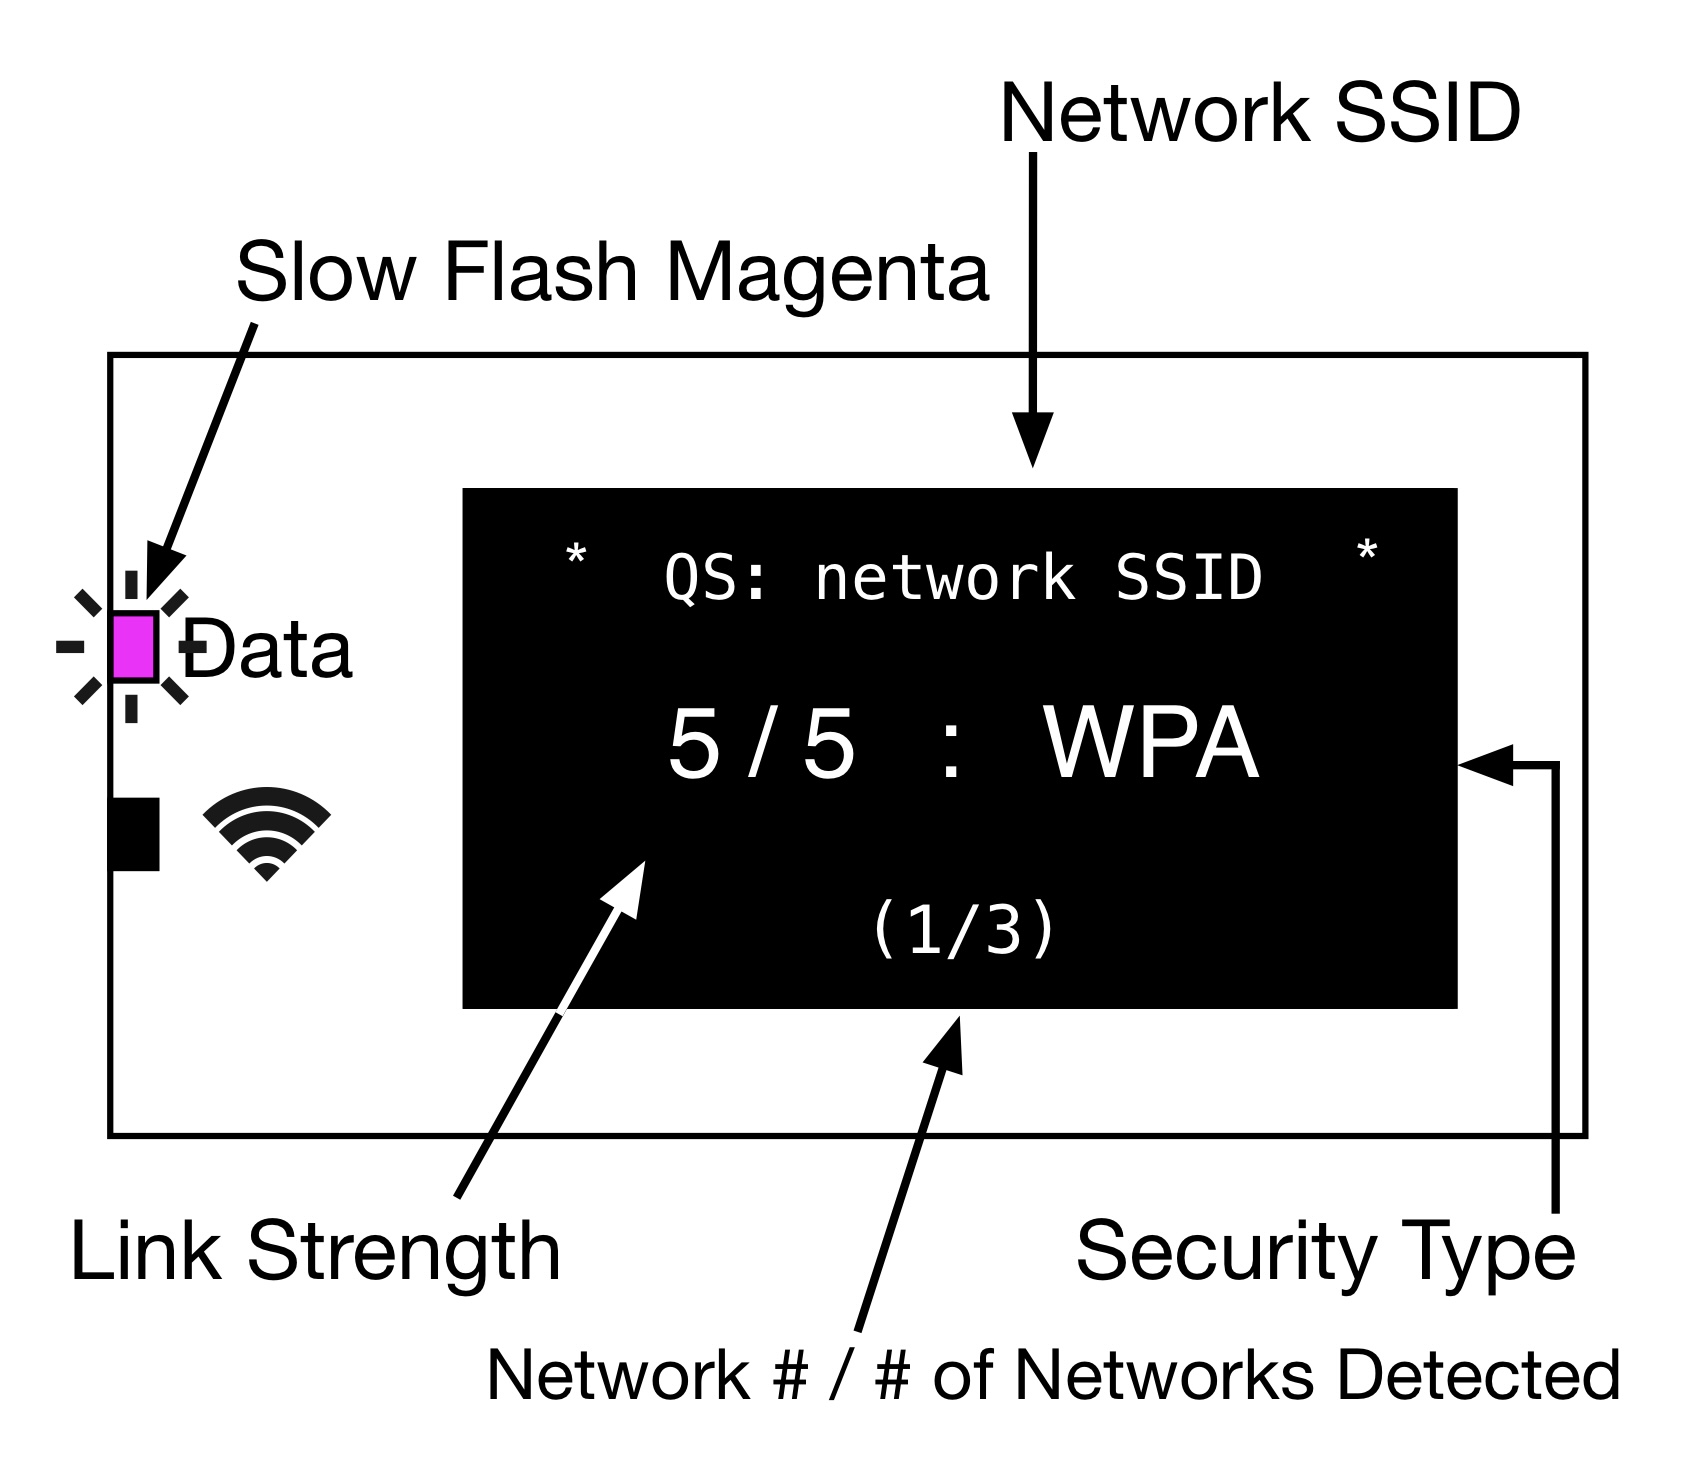
[en] RIGHT Arrow to the [Set Network] menu and press ENTER. Both Status LEDs will quickly flash Light Blue while a scan of available SSID's is performed. When the scan is complete use the LEFT or RIGHT arrows to select the desired SSID and press ENTER.
 |
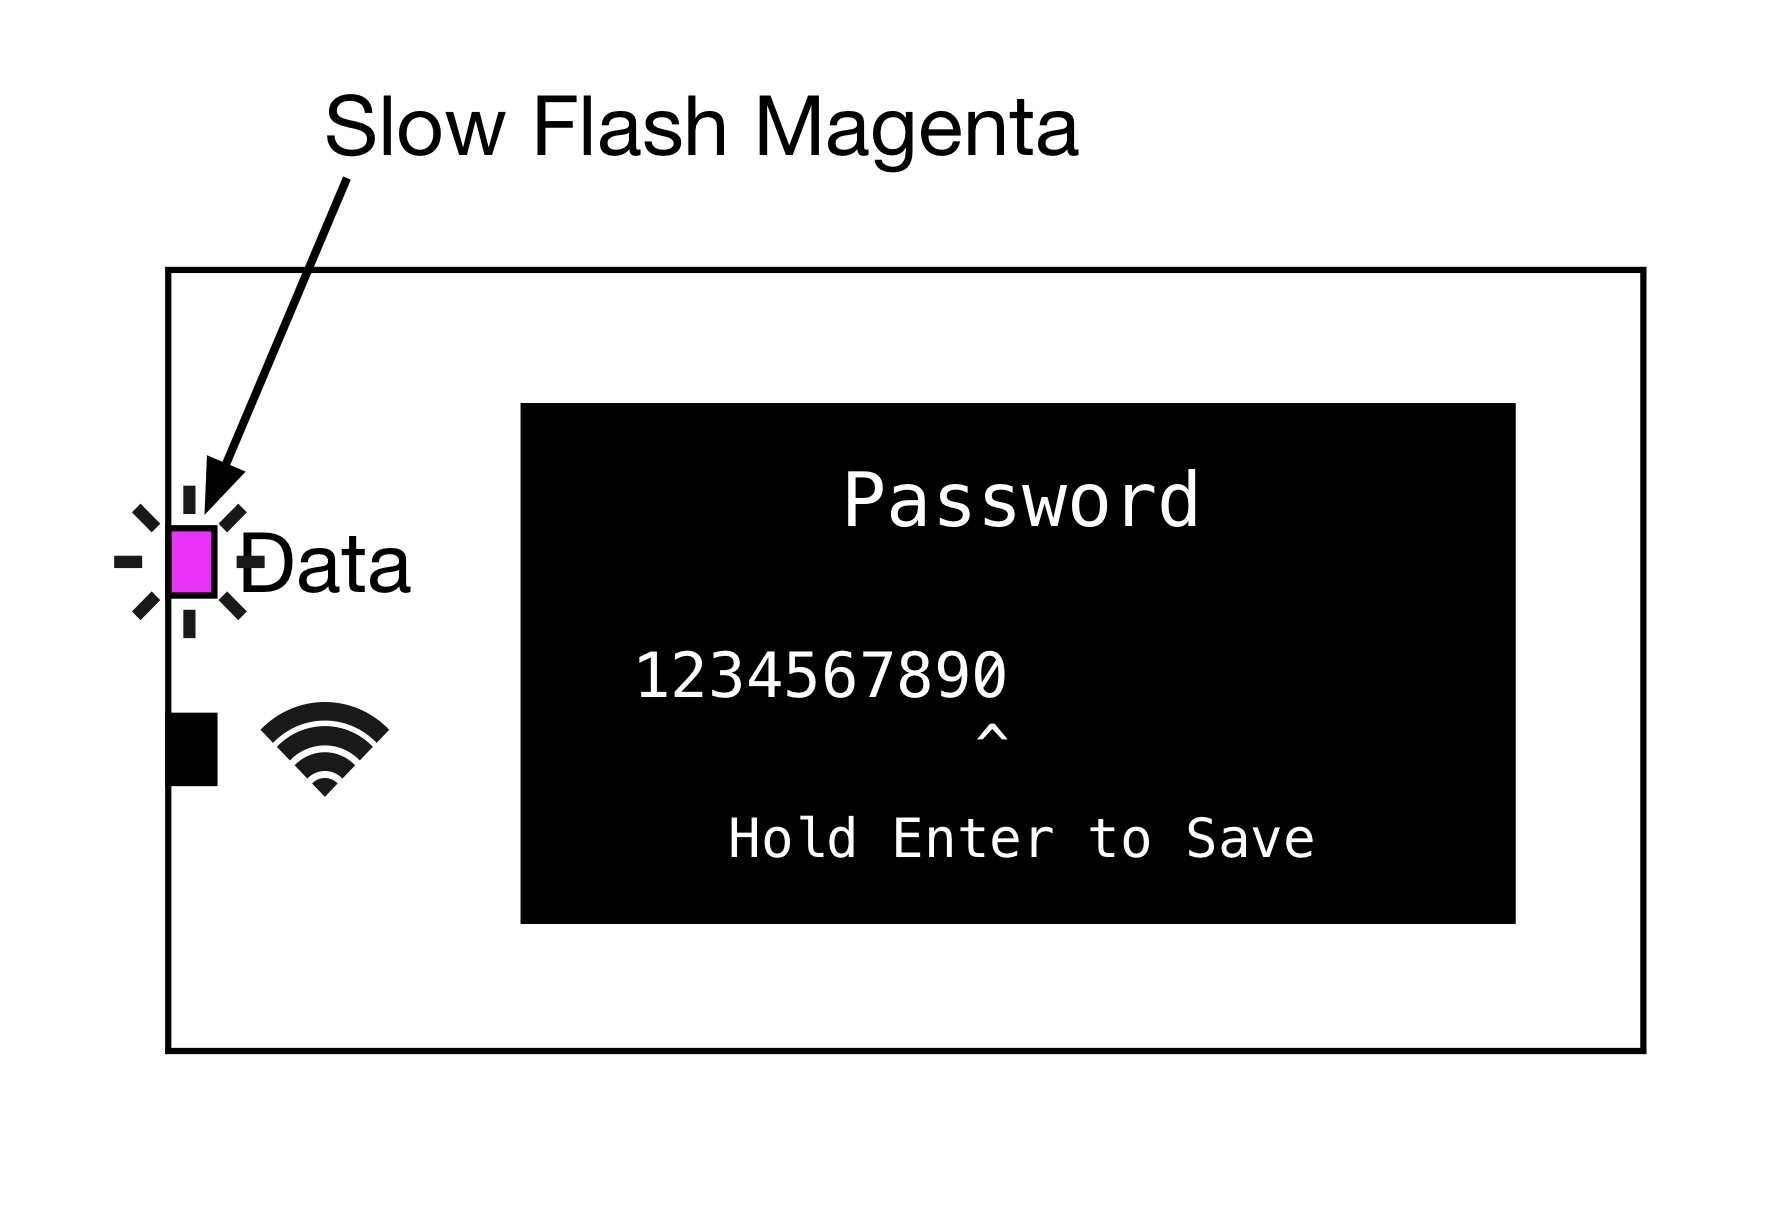
[en] Press ENTER to select the network. You are then asked for the WiFi Password. How to enter a password is covered in the Basic Routing article. Once you've entered the password's final character PRESS & HOLD [ENTER] to Save. If the password is incorrect there will be a Red Error flash on the Status LEDs and then try again.
 |
[en] Auto-Fill Password Trick
[en] Auto-Fill Password Trick (Firmware 0.9 and later)
[en] For Example: QS: ABCD1234 (no lower case letters)
Suggerimento
[en] When you use the same SSID naming convention and Password on your own Network as a Quasar Science SSID, any client RR-R2 fixture will Auto-Fill the password of 1234567890 for you. Saving a lot of entry time when setting up multiple clients. Be sure it's a unique combination that does not duplicate an existing RR-R2 SSID or you may have network connection conflicts.
[en] Once connected and ArtNet is flowing, you will see an updated WiFi Status screen that should look like the following:
 |
Suggerimento
[en] If you still have a Slow Pulse Data LED remember to navigate to [Ethernet Settings] → [Input Universe] and set the desired Art-Net universe that is in use.
[en] Once everything is connected and running the Main Display adopts the standard WiFi Screen
 |
[en] To learn about the alternative WiFi AP → DMX Routing please see >[en] WiFi AP to DMX Routing<
[en] Lost WiFi Connection
[en] If you lose an existing connection (i.e. the Router or AP is powered off) the DATA LED will slow pulse between Red and Magenta.
 |
[en] When the connection is re-established the fixture should automatically reconnect.