Wireless Control: WiFi
WiFi Control allows fixtures to connect to existing wireless networks (Client) or broadcast their own wireless network (AP).
The RR-R2 can be controlled over WiFi by connecting to an existing network (Client mode) or by using the fixture as a wireless Access Point (AP mode) to create your own WiFi network from the fixture. Quasar Science fixtures operate in the 2.4GHz spectrum only.
Note
If the WiFi module's firmware is v1.0A it will require a separate update for functionality to v1.0B. See How to Update WiFi Module
WiFi Client Mode
In earlier firmware you must set Wired Input to Art-Net, and also set the Art-Net Universe in Ethernet Settings. It will be under [Config Menu] → [Wired Settings] → [Wired Mode] (set to Art-Net) → [Ethernet Settings] → [Universe]
In firmware 0.9 you may simply set the Wireless Mode = WiFi and set your Input Universe under Ethernet Settings. You can skip setting the Wired Mode because, well, it is WiFi afterall.
If you're not using DHCP on your router/network, you will also need to set the same Subnet Mask as your network (i.e. 255.255.0.0) in Ethernet Settings or the fixture will not connect when entering a WiFi password.
FW 0.9 Set the Wireless mode to
Config Menu → Wireless Mode → WiFi
***In this mode the WiFi Settings menu is active
Configure the fixture to join a WiFi network. Go to
Config Menu → Wireless Settings → WiFi Mode → Client (default setting)
Select the WiFi network you would like to join. Go to
Config Menu → WiFi Settings → Set Network and press ENTER
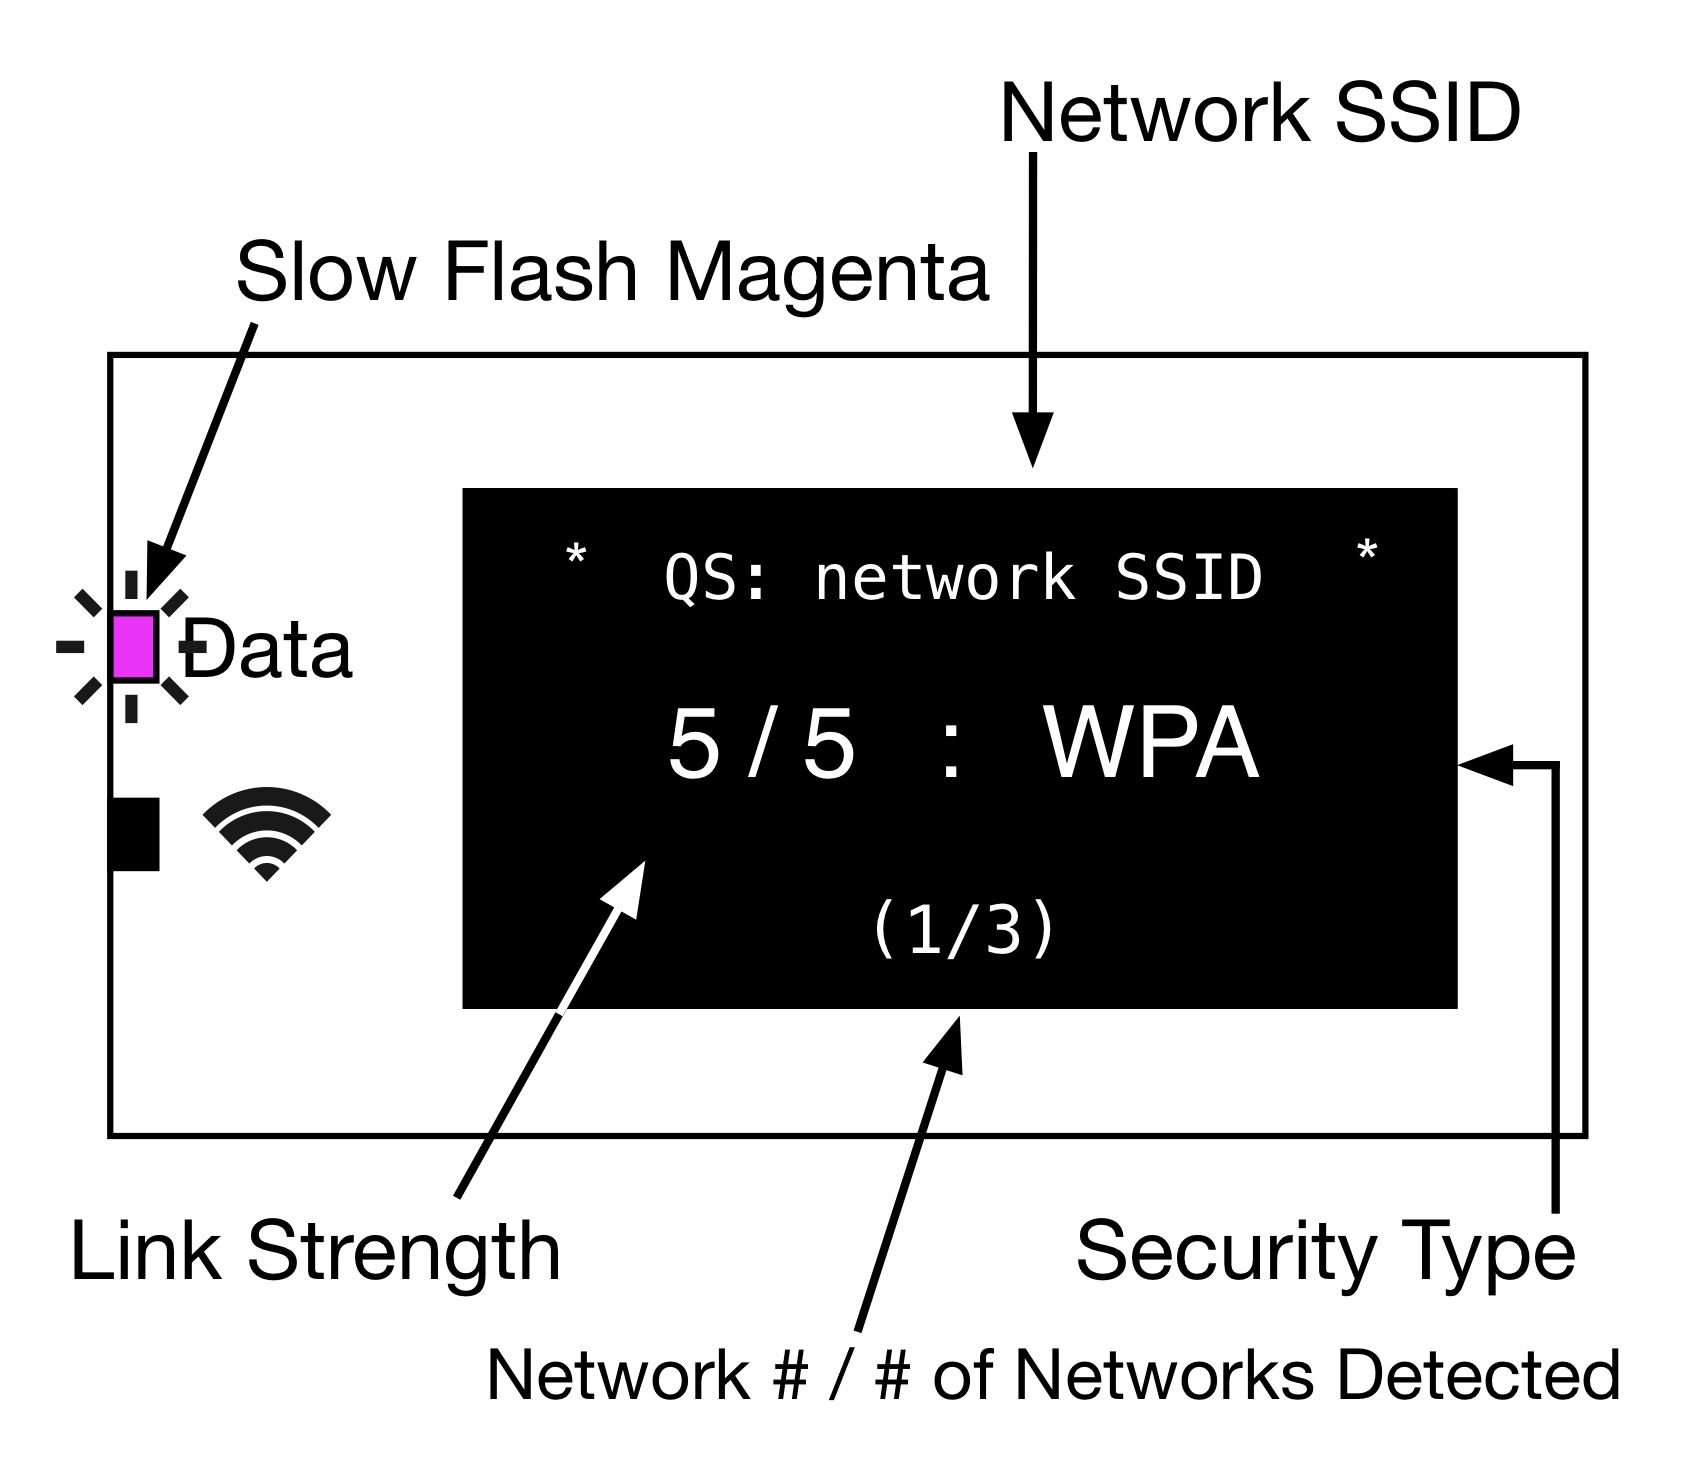
The Status LEDs will flash while the fixture scans for available wireless networks and displays them in order of signal strength
Use the
 and
and  arrows to scroll through the listed networks and
  to select.
Use the
and arrows to scroll letters and numbers to set the network Password.Use the
to advance the cursor.The password field loops around to the beginning in the event a wrong character is entered in the password field. Use the
to advance all the way to the right and it will loop back to the beginning.Press and hold
after entering the last character in the password.The WiFi Status Screen will display the name of the WiFi network the fixture has joined. If there is a controller broadcasting Art-Net over WiFi the Status LEDs on the fixture will display Data = Yellow, WiFi = Magenta.
Auto-Fill Password Trick (Firmware 0.9 or later)
If you use the same SSID naming convention and password on your own Router to match what is used by Quasar Science, any client RR-R2 fixture will Auto-Fill the password of 1234567890 for you when you go to [Set Network]. Saving a lot of entry time when setting up multiple clients. NOTE: Be sure the network name you choose for your own router is unique and does NOT duplicate an existing RR-R2 SSID or you may have network connection conflicts.
Quasar Science SSID format: {QS: [space] [combination of 8 numbers or CAPITAL letters}.
For Example: QS: ABCD1234 (no lower case letters)
Tip
If you're connected to a network but not able to control the light, check the [Input Universe] under [Ethernet Settings]. The input universe applies to WiFi.
WiFi Access Point Mode
 |
Set the Wireless mode by navigating to:
Config Menu → Wireless Mode → WiFi
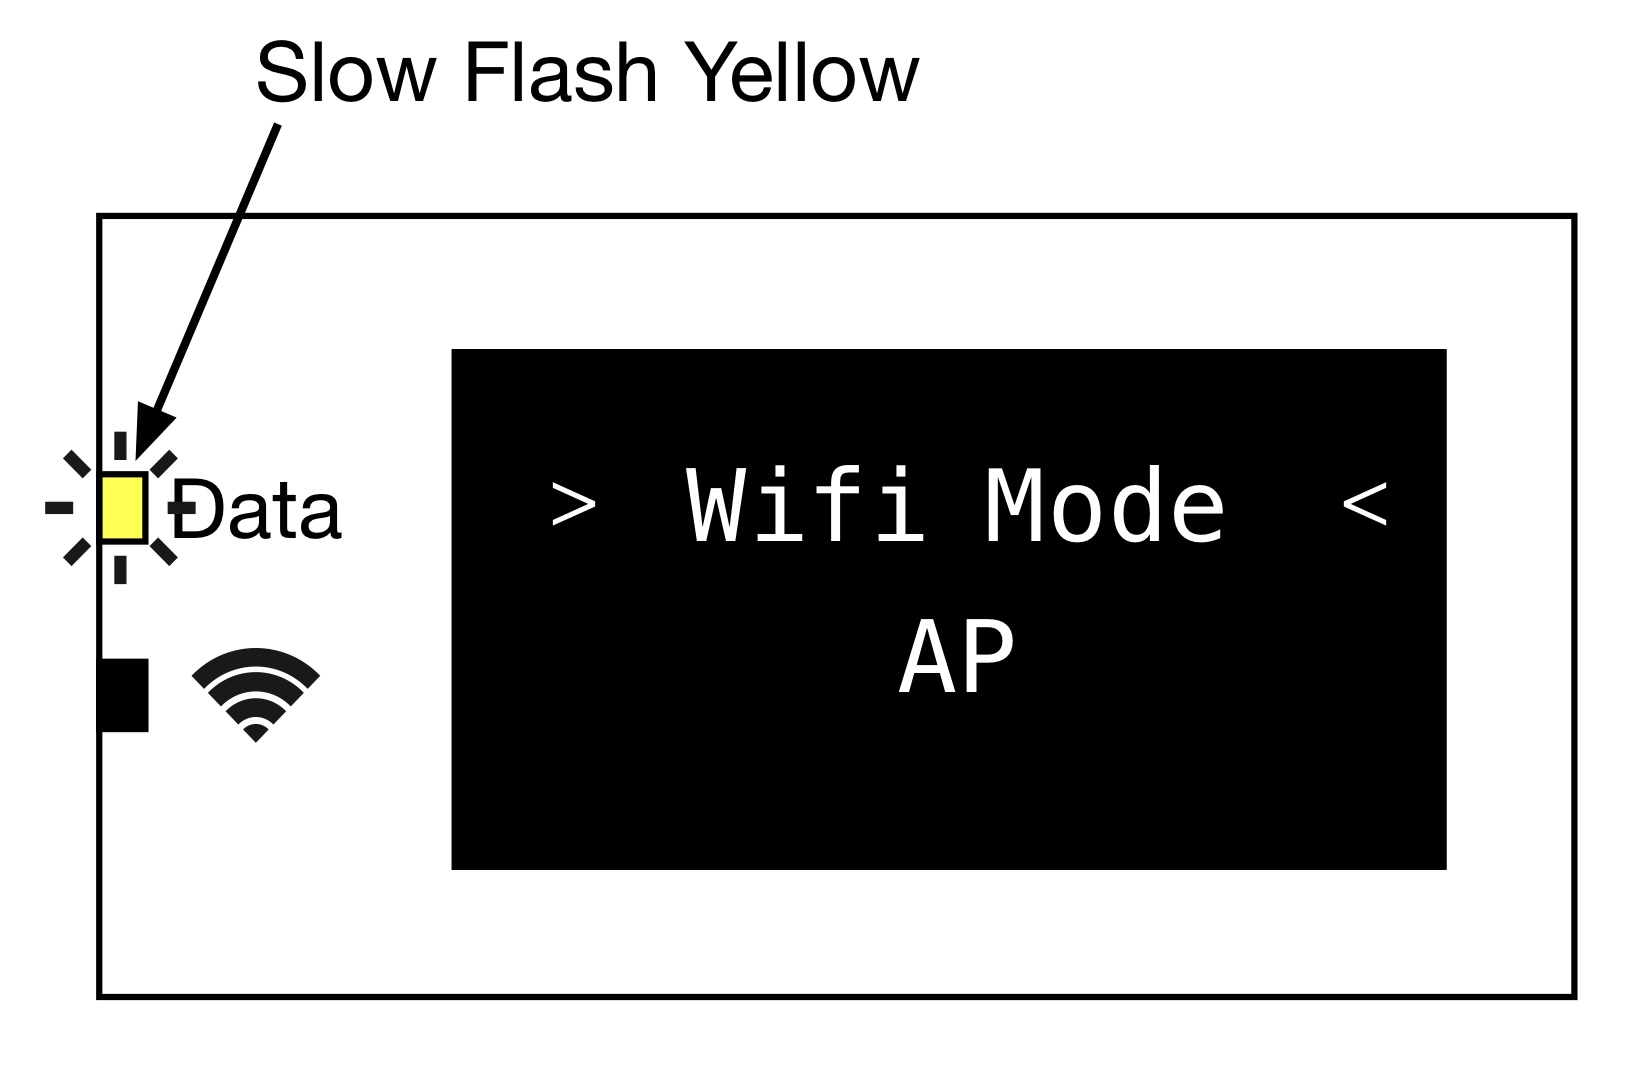
Set the fixture into AP mode:
Config Menu → WiFi Settings → WiFi Mode → AP
When in AP mode the main display of the fixture will show the SSID of the WiFi network. The AP SSID will begin with QS: XXXXXXXX
On the control tablet join the WiFi network being broadcast by the AP fixture. The WiFi password for any Quasar Science AP is: 1234567890
If there is a controller broadcasting Art-Net on the WiFi network the Status LEDs on the fixture will be Data = Yellow, WiFi = Magenta.
WiFi Settings
WiFi Status - Displays the current WiFi connection with signal strength or any errors
Set Network - When in Client Mode this displays available WiFi networks in descending order of signal strength. When the user selects a network they are prompted to enter the password for the WiFi network.
Use the
& buttons to scroll through the alphabet.A short press of
will advance the cursor to the next space.A long press of
will transmit the password and attempt to join the selected Wifi network.The password entry cursor will scroll back to the beginning of the password field from the end of the field.
Allowable password characters are: a-z, A-Z, 0-9, !, @, #, $, ?
Note
If the network does not need a password leave the password field blank and press the
to advance the cursor to the end of the entry field to join the network.WiFi Mode - You can select between Client or AP.
Enable AP Mode - The fixture can act as its own access point and DHCP server to create a wifi network. The fixture will broadcast the network ssid and act as the WAP and router for the network. The fixture will have an IP address of-192.168.4.1
The fixture will distribute IP addresses in the following IP Schema:
IP address: 192.168.4.XXX
Subnet Mask: 255.255.255.0
Reset WiFi Settings - Forgets the connected network and sets the AP mode to OFF
LED Indicators
Solid Magenta - The fixture is connected to wireless network.
Slow Flashing Magenta - The fixture has router information saved, but the router is not currently found.
Fast Flashing Magenta - The fixture is currently connecting to a wireless network.
Magenta / Red Flashing - The fixture has failed an attempt to connect to saved network (Wrong Password or Subnet Mask Error).
Solid Amber - The fixture is acting as WiFi Access Point in [Basic Routing] and broadcasting the network SSID. This LED color will be different when in Advanced Routing modes. See >Updated Status LEDs for Advanced Routing<
Solid Yellow - Art-Net DMX packets are being transmitted
Tip
Secret Menu Tip: From anywhere in the menu system double-tap  , then press the for quick navigation to [WiFi Settings]